Well, if you ever been usin’ Google Sheets and thought, “I wish I could just pick a date right off a calendar instead of typing it in myself,” then you’re in luck! Let me tell ya, adding a calendar selection in Google Sheets ain’t all that hard. It can save ya time and keep your dates organized, especially when you’re keepin’ track of things like appointments, birthdays, or those never-ending lists of chores. So sit tight, ’cause I’m ’bout to show ya how to do it step by step. Grab a cup of tea, and let’s get started!
Step 1: Open Up Google Sheets


First thing ya gotta do is open up Google Sheets. Now, ya can either start a brand-new sheet or pick an old one, don’t matter much. Just go ahead and open it up and get ready to work. Once it’s open, make sure you’ve got the right cell where you want to add the calendar picker. It’ll be the place where you need to pick your date from the calendar, so choose wisely!
Step 2: Go to the Data Menu
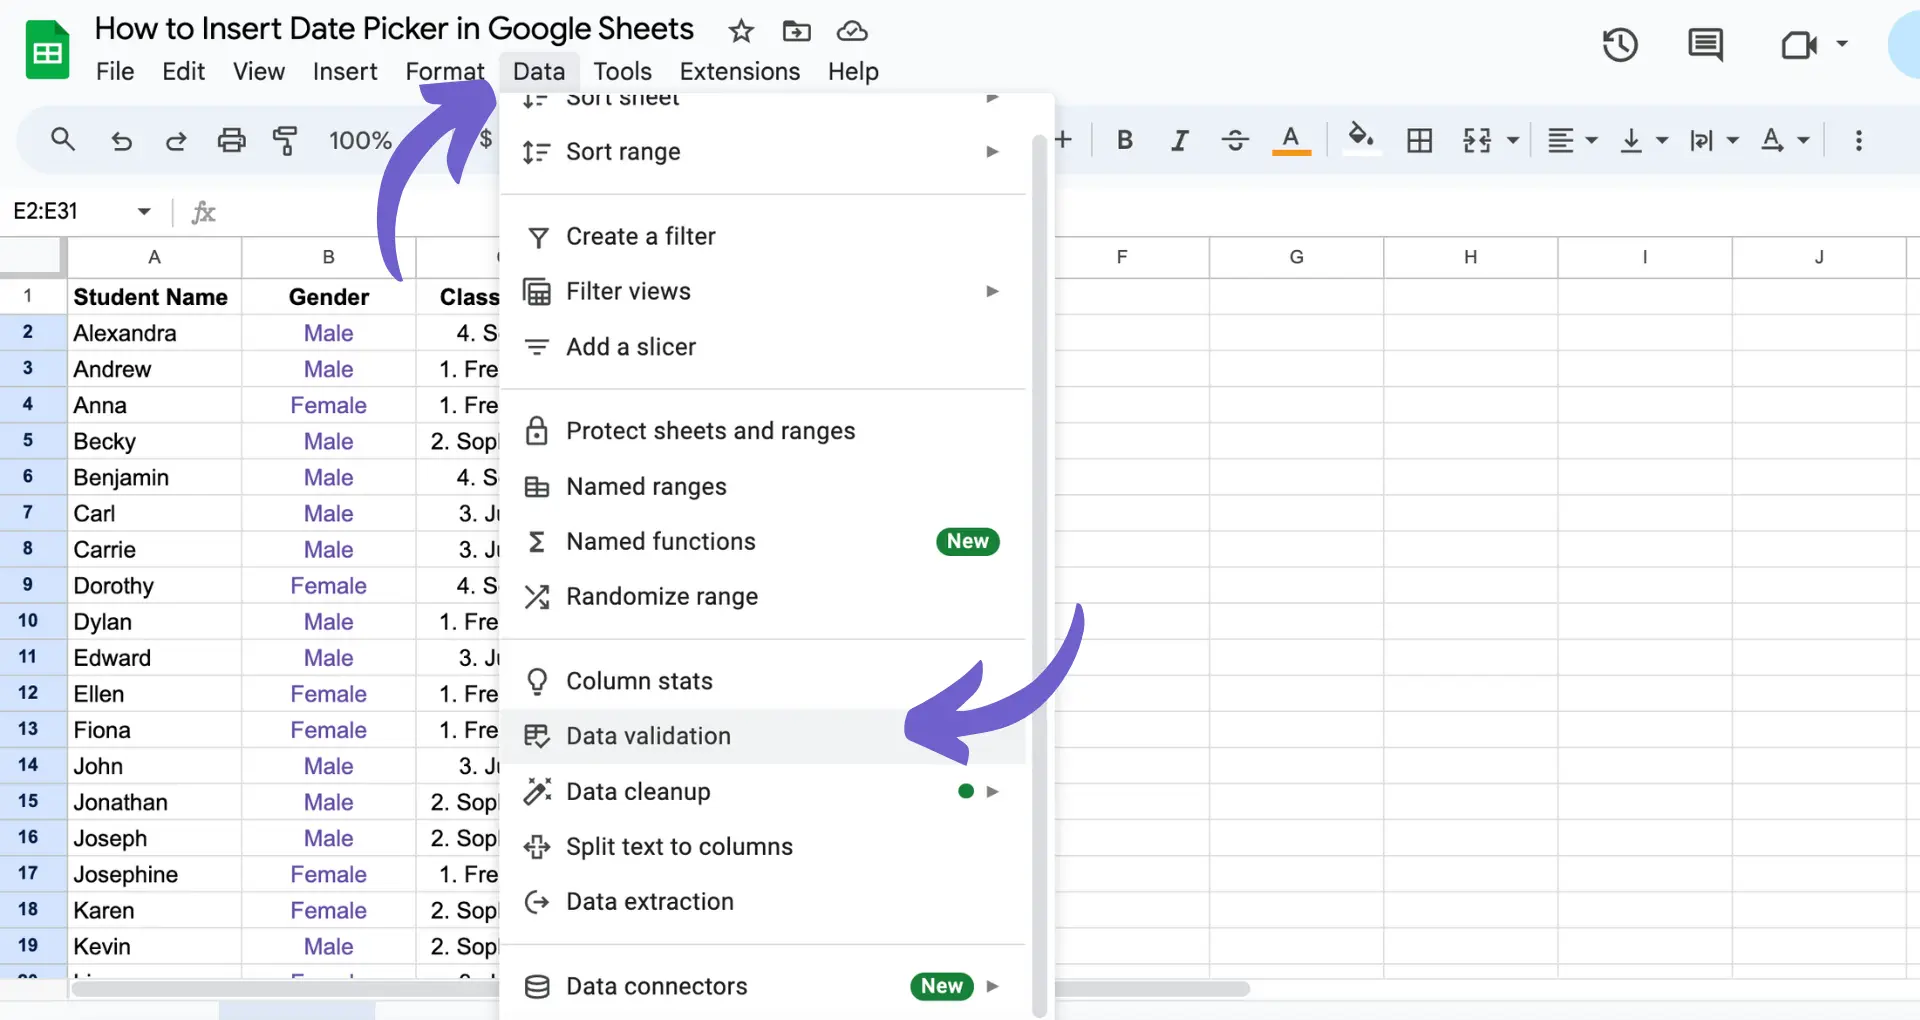
Next, look up at the top of your screen and find the “Data” menu. It’s sittin’ right there with other options like File, Edit, View, and so on. Click on it, and a list of options will drop down. What you’re lookin’ for here is the “Data validation” option, which sounds fancy but don’t worry, it ain’t gonna bite!
Step 3: Set Up Data Validation
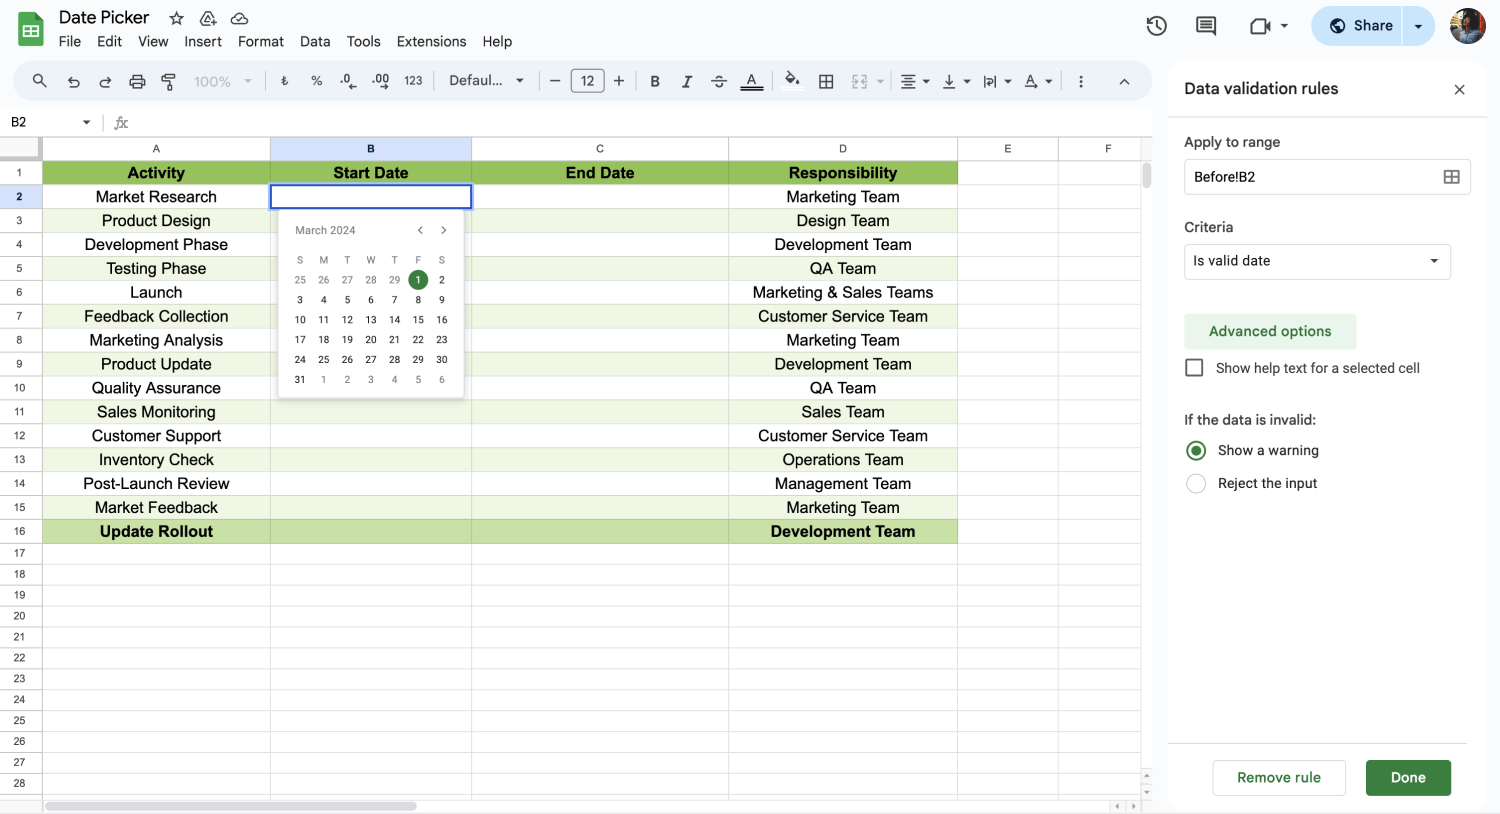
Once you click on “Data validation,” a box will pop up. In this box, you’ll see a bunch of different options, but the one that’s gonna help ya add a calendar picker is under the “Criteria” section. From the drop-down menu, select “Date” – this tells Google Sheets that you want to pick a date, not just any number or word.
Now, if you want it to be even easier, you can check the box that says “Show input message when cell is selected,” which will show a little reminder pop-up when you click on that cell. You can leave it unchecked if you like, but it’s a handy little feature, especially for folks who might forget!
Step 4: Save and Close the Box
Once you’re done setting that up, click “Save.” Now, when you click on that cell, you’ll see a little calendar pop up next to it. It’s like magic! You can now pick a date just by clicking on it, and it’ll fill the cell with the right date. So easy, even a chicken could do it!


Step 5: Make Sure It Works
To make sure it’s workin’ right, just click on the cell where you set up the date picker. You should see that little calendar pop up. Click on any date, and ta-da! It’ll show up in the cell. No more worryin’ about typos or putting in the wrong date.
Extra Tips and Tricks
If you’re doin’ this for a big project, and you need to make sure everyone’s on the same page with dates, you can use the same date picker for other folks too. Just make sure they have access to the sheet, and they’ll be able to pick dates just like you.
Another thing is, if you want to make sure folks only pick dates within a certain range, ya can set up restrictions. For example, if you’re makin’ a schedule and want folks to only choose dates within this week or next, you can adjust the settings so that only dates within a certain range are allowed. That way, you ain’t gonna end up with some oddball date that don’t fit with the rest of the schedule.
Wrapping It Up
Well, there ya have it! Addin’ a calendar to Google Sheets ain’t as hard as it sounds, and it can really make your life easier when it comes to picking dates. Whether you’re keepin’ track of appointments, birthdays, or just need to make sure you don’t forget a thing, this little trick will help ya stay organized and efficient. So go ahead, try it out for yourself, and see how much smoother your day goes. Ain’t nothing better than having a calendar right at your fingertips!
Happy sheetin’!


Tags: [Google Sheets, add calendar, date picker, Google Sheets tutorial, calendar selection]


