Well, let me tell ya, if ya wanna make your Google Sheets look a little nicer and easier on the eyes, changin’ up the row colors is a real good idea. It ain’t too hard, don’t you worry. You just gotta follow a few simple steps, and your data will look all neat and tidy like a freshly made bed.
First thing’s first, ya gotta select the rows you want to change. You know how to do that, right? Just click and drag your mouse over the rows, or if you’re more of a keyboard person, hold down that Shift key and use your arrow keys to select exactly what you need. Just make sure you don’t go too far, or you’ll be messin’ up your whole sheet!


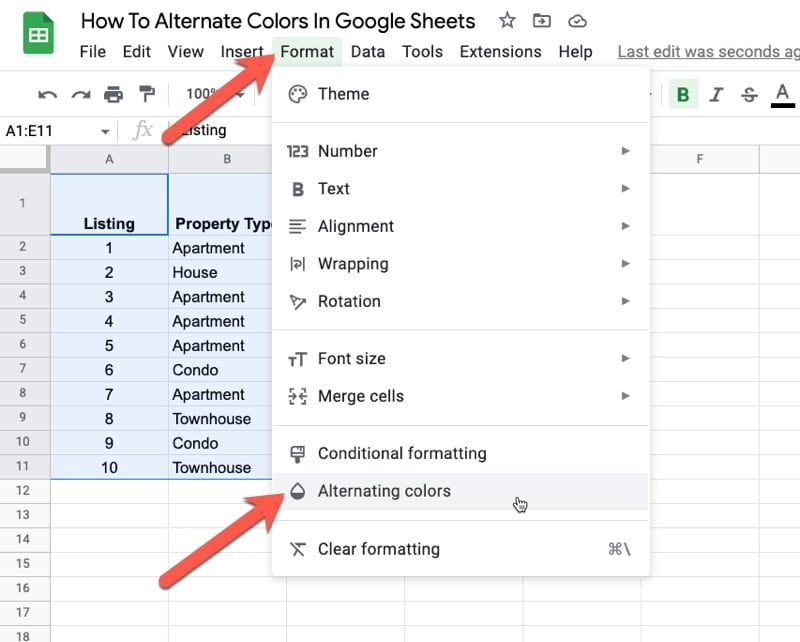
Once you’ve got your rows selected, go up to the top and find the menu that says “Format.” Click on that, and a bunch of options will pop up. Now, you wanna look for the one that says “Alternating colors.” Sounds fancy, huh? But it’s real easy, just click on that and you’ll see the magic happen right in front of your eyes.
Now, when you click on “Alternating colors,” it’ll open up a little window. You can choose how you want the colors to look. They give you some preset options right there, but if you’re feelin’ fancy, you can change the colors to whatever suits your needs. Maybe you want something light and soft, or maybe you need bright colors to really make your data stand out. Experiment with it, there ain’t no harm in playin’ around a little till you find the perfect combo for your sheet.
Why Should You Alternate Row Colors?
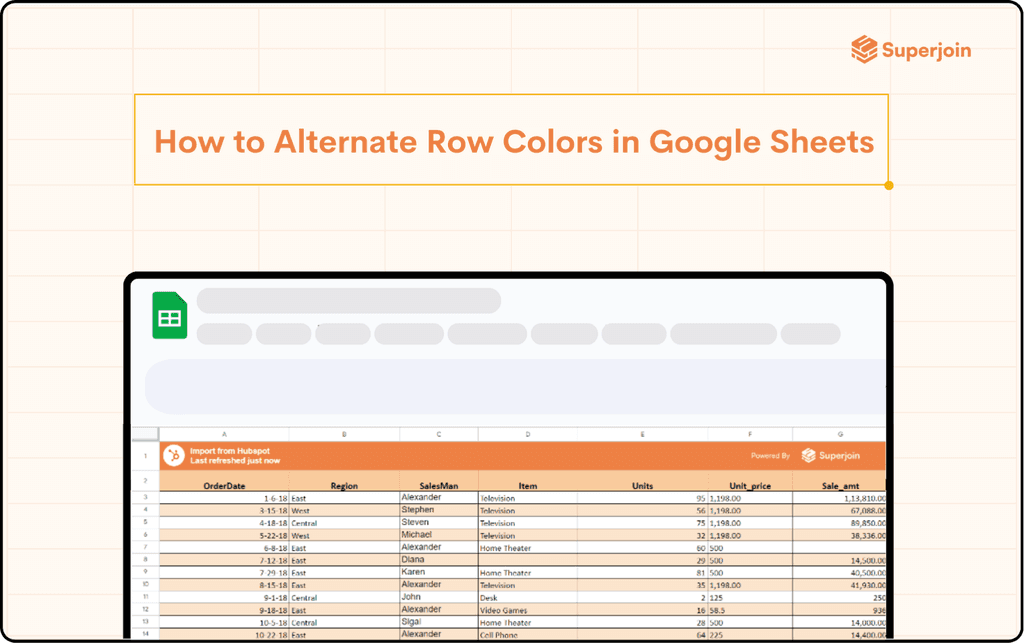
Ya might be askin’, “Why bother with this whole alternating row thing?” Well, I’ll tell ya. When you’ve got a lotta data in front of ya, it can get hard to keep track of where one row ends and the next one begins. If your rows are all the same color, it can get all jumbled up in your head. But when you alternate those colors, it helps ya follow the data much easier. Kinda like when you lay down a quilt and each patch is a different color—makes it easy to see where everything is.
Some Tips for Pickin’ Colors:
- Try to go with lighter shades, ’cause them dark colors can make your eyes hurt after a while.
- Pick colors that go well together. Don’t go all wild with neon pink and green unless you’re makin’ a circus, ha!
- If you’re lookin’ to print the sheet out later, think about how the colors will show up on paper.
- Keep it simple. You don’t need a million colors, just a few different ones will do.
If ya ever feel like you made a mistake and wanna change things back, it’s easy. Just go back to that “Alternating colors” menu and pick a new color or turn it off altogether. Ain’t no big deal, just a few clicks and you’re back to where you started.
Another thing to remember is, once you’ve set your alternating colors, you can still do other formatting to make things look even better. Like, boldin’ the headers or makin’ certain columns stand out with a different font. It’s all about makin’ that sheet work for you, so you can read through all that data without straining your eyes.
Final Thoughts:


So, to wrap it up, alternating row colors in Google Sheets is a mighty simple thing to do, but it sure does help. It makes things look more organized, helps ya spot errors quicker, and overall just makes your sheet easier to read. If you’ve got a big ol’ spreadsheet full of numbers and words, this little trick might save ya a lotta time and headache. Just remember to pick colors that work for you, and don’t be afraid to experiment till you find the perfect match.
Tags:[Google Sheets, Alternating Row Colors, How-to, Formatting, Data Organization, Easy Formatting]


